Ultimate Guide to How to Clear Cache on Mac
This guide helps you to save more space on your MacBook. Follow the given below steps to clear cache on mac.

When you first get a new Mac and start using apps, it automatically starts creating and saving cache on your device. This is a usual thing, and most computers do it. But as time goes on, this cache can get pretty big and take up a bunch of space on your disk. To free up some space on your Mac, one way is to clean out this cache. If you’re using macOS Sonoma or an earlier version, here’s how you can do it.
Follow the steps to clear the cache on Mac:
- Close all open apps after saving your data or progress.
- Launch the Finder app.
- Click on Go in the menu bar
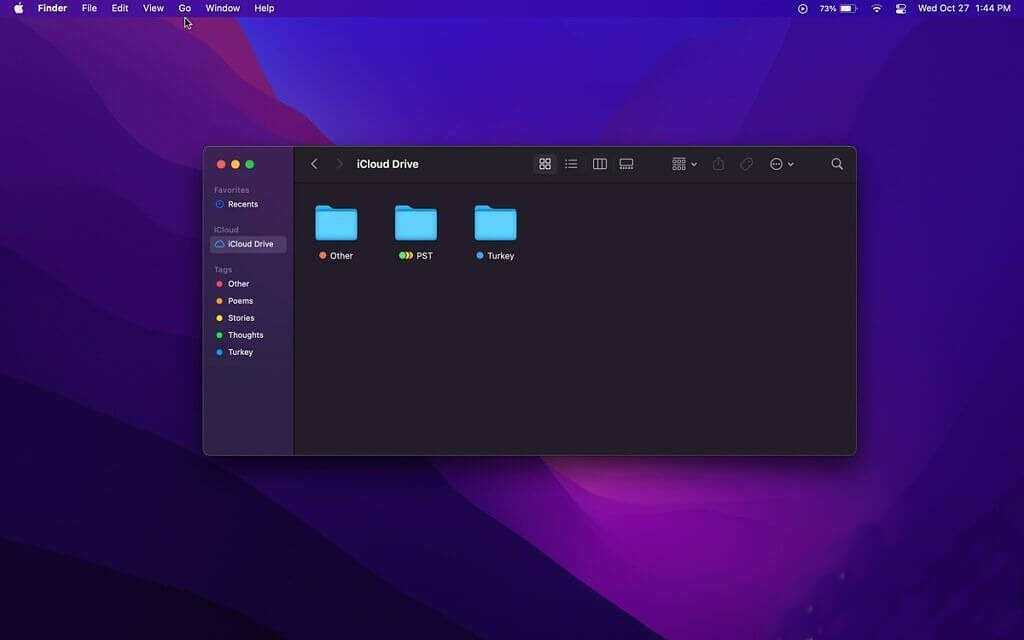
- Tap on Go to Folder
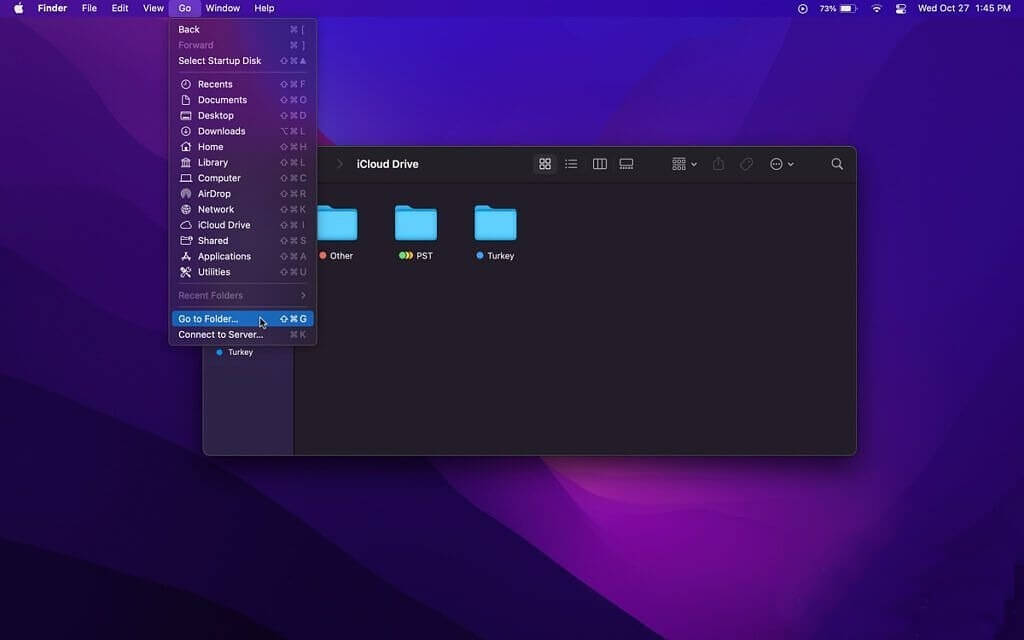
- Type ~/Library/ in the text field

- Hit the Return key.
- Locate the folder titled Caches

- Enter it.
- Hit Command + A to select all of its contents.
- Press Command + Delete to trash the included files and folders

- Hit Shift + Command + Delete to empty the Trash.

- This will free up even more space on your Mac and sometimes fix certain bugs.
Do you know what is cache? Let’s understand.
Caches are like files that apps and macOS use to store stuff they’ve loaded before. Deleting cache usually won’t make you lose any crucial data, but the downside is that the next time you open your apps, it might take a bit more time because they’ll have to reload the content that got deleted. So, why bother clearing the cache if the apps are just going to make more of it again?
Why we need to clear cache?
Sometimes, caches stick around for stuff that’s no longer necessary or even there. Clearing the cache gets rid of these useless files. The next time you fire up an app, it’ll only create the essential updated cache it needs to run. So, the new cache won’t be a carbon copy of the old one you trashed. It’ll be smaller, giving your Mac some extra breathing room in terms of storage.